Showing posts with label Desserts. Show all posts

Monday, January 30, 2017

Cupcake Ghosts


Bring a dessert to life with a simple technique from Karen Tack and Alan Richardson! In the book What’s New, Cupcake? Both of the authors implement a series of simple, plain, and unique alterations to cupcakes. With this dessert, I can emulate a finished piece, one that is creative and very easy.

These are the ingredients that I used:
1 can (16 ounces) chocolate frosting
2 containers (8 ounces each) frozen whipped topping, thawed in refrigerator
24 1 ½ - inch balls of ice cream (any flavor)
Multicolored candy-coated chocolate-covered sunflower seeds or chocolates
(Tack and Richardson 157).

I began this dish by prepping the cupcakes. I mixed the batter in with 3 eggs, a cup of water, and half a cup of oil. Then, after a few minutes of mixing, I placed it in the oven set to 325 degrees. After a set amount of time has passed, I had the cupcakes fresh and ready.


I began to approach the dish by carving out a spherical shape from the cupcake, not too far from the edges. Tack and Richardson suggested to sprinkle grounded cookies on top of the cupcake, but I decided to take a different route. I excluded that step, and, instead, I went on to filling the hollow portion of the cupcake with a small scoop of ice cream.
At this point, there were only a few more steps to put the final piece of the ghost together. I then coated the cupcake in a swirl-like fashion. As Tack and Richardson suggested, “Pipe a circle of the whipped topping around the base of the cone cake. Pipe a smaller circle on top of the ice cream and the whipped topping to cover the cake, then pipe a third layer of whipped topping, using a squeeze-release-pull motion” (157). This overall created a ghostly effect; the stacked swirls represent an animated outlook of how ghosts are shaped. At the end of this method, I peaked at the very uppermost portion to signify a ghost-like head.


I finished off the dessert by placing two sunflower seeds just below the very top of the frosted twirls to depict eyes. The finished piece was generally very simplistic, yet incorporates different flavors to achieve a desired effect both flavorfully and creatively. Through making this dish, I’m curious as to how else you can transform dishes like these. How do you bring your desserts to life?

Tack, Karen and Alan Richardson. What’s New, Cupcake? New York, New York. Houghton Mifflin Harcourt Boston 2010

Cupcake Ducks


Remodel the world-known cupcake through a series of shapes and design!

Ingredients:
24 vanilla cupcakes baked in yellow paper liners
2 cans plus 1 cup vanilla frosting
Yellow food coloring
12 marshmallows
20 plain doughnut holes
14 orange fruit chews
48 brown mini candy-coated chocolates (M&M’s Minis)
(Tack and Richardson 129).
Cupcakes are usually uniform in its creation, but I decided to utilize variances of forms to create a duck replica. To prep the dish, I began to prepare all the individual parts. I began with the duck’s tail; shaping the spongy piece with both ease and difficulty. In Karen Tack and Alan Richardson’s example, the marshmallow is displayed so it angles like a tail of a duck. For stabilization purposes, I used two toothpicks to connect both the modified marshmallow and doughnut hole to the cupcake.

Following those steps, I got 6-7 tablespoons of frosting and added multiple drops of yellow food coloring in to a bowel. Mixing the paste eventually gave a nice, yellow hue. However, without having the proper tools, I had to figure out a way to dip it into the frosting. After I had the duck structured the way I wanted it, I coated it in the finished frosting look. According to Tack and Richardson, they suggested, “Holding the cupcake by its paper bottom, dip it into the yellow frosting just up to the liner” (131).
Finally, I added the brown coated chocolates to play as the eyes and placed it on the doughnut hole structure. Then, I used the orange fruit chews to act as the beak of the duck. Cutting them in half, I was then able to get the desired size. I flattened the pieces and bent it at an angle where it would resemble an open beak (131). Securing it onto the cupcake was a challenge, but eventually it was pinned in place with delicate pressure.
Creating this dish was a bit of a struggle but was overall had complementary pieces that sufficed. Manipulating the shapes offered a different take on making cupcakes, something I’d usually make with much more ease. Throughout making this dessert I began to wonder: What difficulty do you add to your hobbies?
Tack, Karen and Alan Richardson. What’s New, Cupcake? New York, New York. Houghton Mifflin Harcourt Boston 2010

Sunday, January 15, 2017

Cupcake Roses


An elegant dessert served with candy, frosting, and cupcakes require quite a bit of detailing! A cupcake rose is a savory snack with a simple touch to the world’s favorite cupcake! With a few key ingredients, this recipe can be mastered:
  • 1 cup granulated sugar
  • 2 bags (10 ounces each) cherry candy fruit slices
  • 6 green fruit chews (Tootsie Fruit Rolls, Jolly Rancher)
  • 1 cup red decorating sugar (Cake Mate)
  • ½ cup white decorating sugar
  • 1 can (16 ounces) vanilla frosting
  • 1 ½ cups small light green jelly beans (Jelly Belly)

(Tack and Richardson 123).

To start off my dish, I began to bake the vanilla cupcakes myself. The batter required a mixture of three eggs, a cup of water, and half a cup of oil. With the oven set to 325 degrees, I placed the new mixture inside the oven. While I waited for it to cook, I continued on with my recipe.
The more thorough portion of the recipe all came down to the cherry candy fruit slices. After opening up a package of cherry candy fruit slices, I used scissors to sever the candy and flattened it to become one single, smooth surface. Initially, sugar bits and pieces were pasted on to the candies, and after persistently washing it under water, they became a flat exterior.

I began to cut the small pieces so they rounded at the ends like flower petals. I would have the larger petals wrap around the smaller petals so that it would create a Russian-doll effect. According to Karen Tack and Alan Richardson, they state, “Add another strip of candy, continuing to roll up around the outside of the center, always pinching the bottom end to secure” (Tack and Richardson 123). Rearranging them so that they won’t overlap, I began to pull back the edges to give off a more rose-like effect.

Overall, this cute dish serves as a delightful sweet that brings the family together for any occasion! Going back in to routinely things after the holiday break sets an atmosphere of stress, so getting together with some sweets is a "treat" for all! What dessert lets you wind back?

Tack, Karen and Alan Richardson. What’s New, Cupcake? New York, New York. Houghton Mifflin Harcourt Boston 2010

Saturday, December 31, 2016

Cupcake Apples

Dive in to a savory dessert with a creative touch to the classic cupcake! Karen Tack and Alan Richardson composed a delightful dish for all made simple. The world-known cupcake has been transformed in to a unique dish through the inspiration of an apple. Surprisingly, the two makes a cuisine that has undeniable goodness. Just follow a few easy steps to achieve the cupcake apples.

These are the ingredients I used:
1 can (16 ounces) vanilla frosting
8 mini plain or chocolate-covered doughnuts
4 chocolate chews (Tootsie Rolls)
6 green fruit chews (Jolly Rancher, Tootsie Fruit Rolls)
(Tack and Richardson 121).
Also, I used red food coloring to create a vibrant hue of an apple. Starting off with making a red paste, I added multiple drops of red food coloring to five tablespoons of icing (121).
Leaving the paste to the side, I started to craft the vanilla cupcakes. Creating the batter required a mixture of three eggs, a cup of water, and half a cup of oil. Then, I set the oven to 325 degrees and placed the mixed batter in it. During the time I waited for the batter to cook, I set out to create the other features of the cupcake design.
Mini doughnuts illustrated the shape of the apple. To slim the look of it, I cut the mini doughnuts in half from the side. I then used the red paste from earlier to coat them to give off a shiny look. Shortly after the batter was done baking, I placed the set mini doughnuts onto the cupcakes.

Adding on to the more decorative portion of the apple, I used a tootsie roll and a green fruit chew to give off a more accurate depiction. These two played a role by creating stems and leaves for an apple illusion. According to Tack and Richardson, “For the stems, cut the chocolate chews in half lengthwise on the diagonal and shape each half into a stem” (121). However, I took this as a guideline and did my own take. I flattened out the tootsie roll as a first step instead, then cut and shaped it to my liking. On the other hand, the green fruit chews were a little more difficult to control. The green fruit chews were prepackaged with sugar, so washing off all of the excess bits took up more time than expected. Also, the chunky candies were more of a challenge to flatten and to trim. Fortunately, with enough caution, leaves formed.
 

To finish off the piece, I coated the cupcakes with red decorating sugar to mimic a gleaming apple. Overall, this dessert was delicious from the multiple sweets involved in it – all under the looks of an apple! It’s amazing how a mixture of chocolate, vanilla, icing, and candy toppings all in to one bite can be as just as savory as any of those alone. What do you think is the perfect dish combination?


Tack, Karen and Alan Richardson. What’s New, Cupcake? New York, New York. Houghton Mifflin Harcourt Boston 2010

Thursday, December 1, 2016

How to Make the Best Desserts in 20 minutes or less!

As you finish that last bite of your dinner, you start craving for something. What is that thing? Vegetables? Meat? Fruits? NO! Everyone starts craving for something sweet, something like a...what is it again?...OH YEAH! IT'S A DESSERT! But OH NO, you're worried that this dessert will take forever to make! Is there any solution!?

For me, I have always wanted a good dessert to eat after finishing dinner but I know that making a good dessert dish will take at least an hour to make but now I have found 2 DELICIOUS dessert recipes that can get you in and out of the kitchen in 15 minutes!

Vanilla Parfaits

This is a dessert dish where you can even be a little creative too while making this. You don't have to put in the EXACT ingredients I put in this recipe (Lagasse, 98). You can probably add some fruit or even ice cream or nut of your choice. The main point is that this dish is VERY tasty and makes me just keep wanting to eat it. And the best thing is that you hardly spend 10 minutes in the kitchen making this!

Ingredients needed:
-1/2 cup of chocolate chip cookie crumbs
-2 tablespoons of crushed nuts
-2 table spoons of Vanilla ice cream
-1 1/2 teaspoons of chocolate sundae syrup


Directions:

1.) Take the ice cream and put it on a cup or bowl


2.) Take the cookie crumbs and spread it around the ice cream


3.) Take 1 tablespoon of syrup and sprinkle it around the ice cream


4.) Take the crushed nuts and also sprinkle it around the ice cream. Then, finish it off with 1/2 tablespoons of the syrup remaining.


5.) Enjoy!


Peanut Butter-Chocolate Chip Cookies

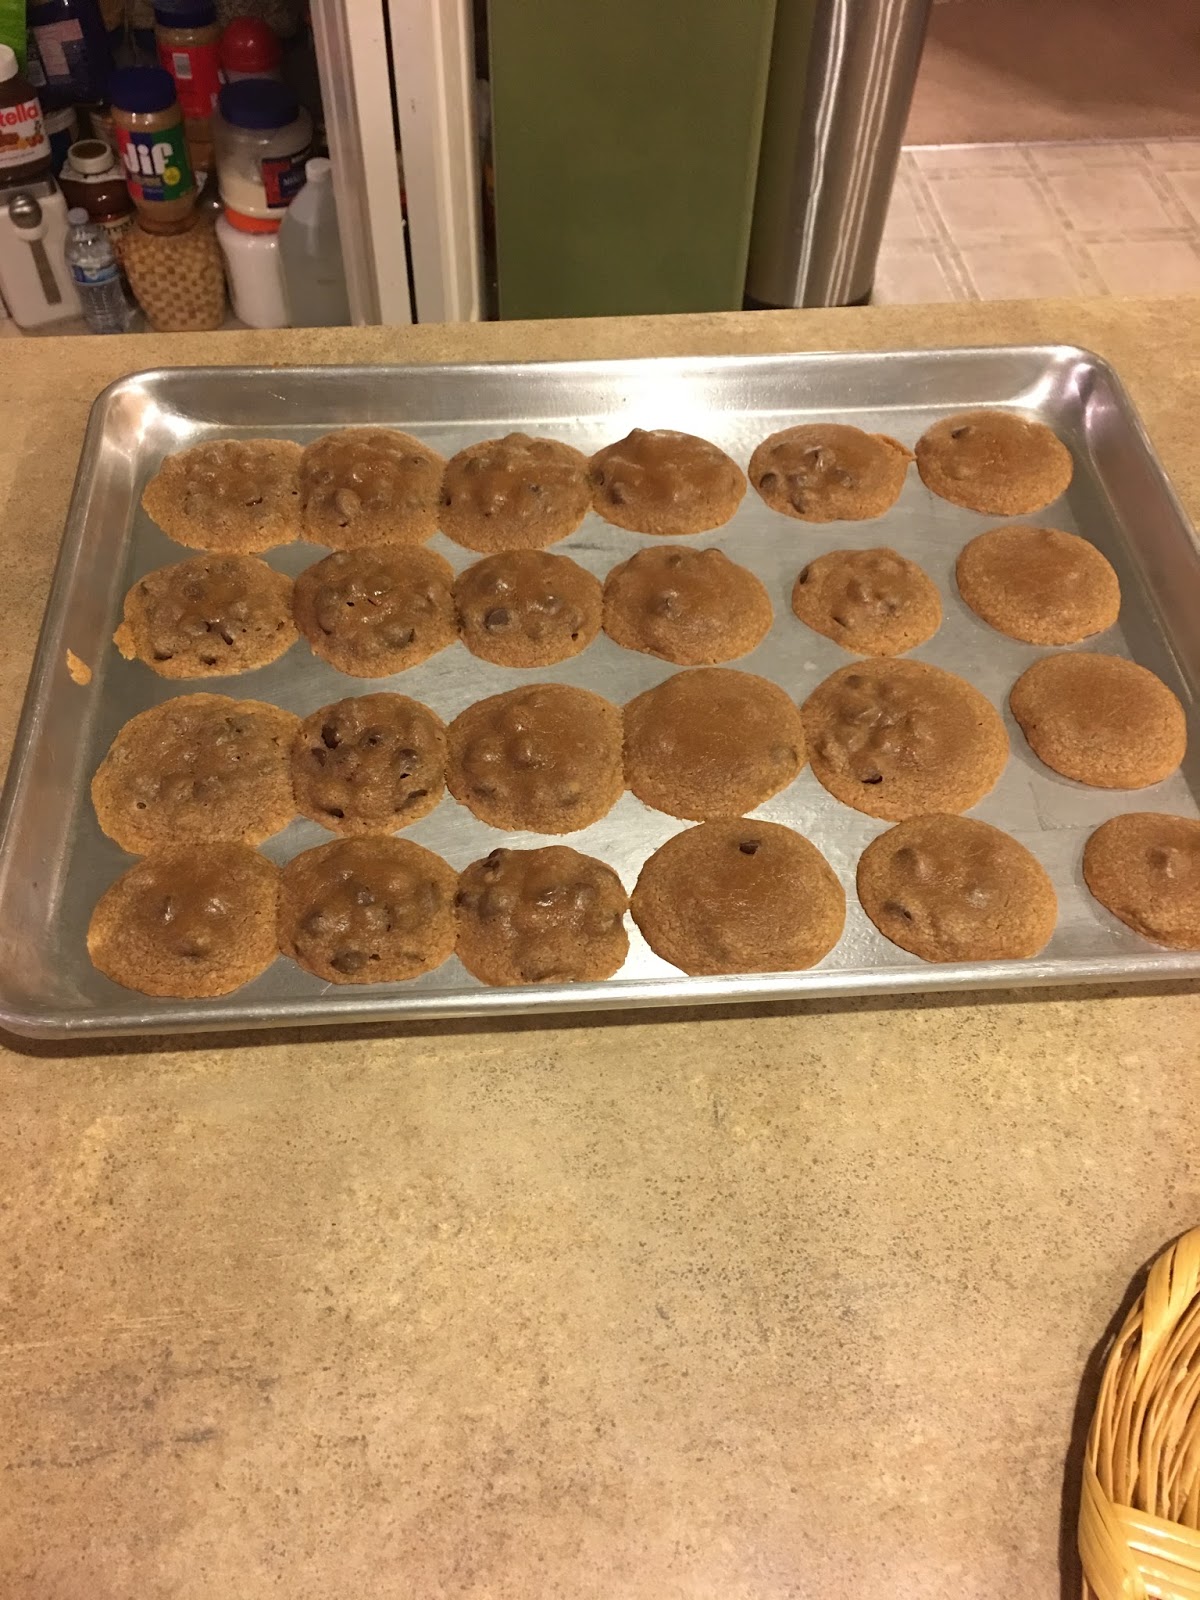
These cookies are probably going to be "the easiest and best-tasting peanut butter cookies you will ever make" (Lagasse, 102). And Emeril Lagasse isn't lying when he says this. These cookies are the easiest cookies to make. No complications, no hassle, and it just takes 20 minutes to make in total! The chewy texture of these cookies are what makes these stand out in front of all the other cookies. And best of all, there is no flour!

Ingredients and Materials Needed:
-1 cup of creamy peanut butter
-3/4 cup of granulated sugar
-1/2 cup of chocolate chips
-2 eggs (brown or white)
-1 teaspoon of vanilla extract
-A large bowl to stir the dough
-A baking pan to bake the cookies
-Cooking spray
-Oven
-Latex Gloves


Directions:

1.) Preheat the oven to 350 degrees Fahrenheit


2.) Beat the eggs and put it in the bowl, then combine all the other ingredients into the bowl


3.) Stir by either using a wooden spoon or and electronic mixer

THERE'S MY STÜSSY SELF

4.) After the dough is smooth, grab the latex gloves, put them on, and pick up chunks of the dough and roll them into balls and put it on the baking pan. Aim for putting 24.

5.) When the oven is ready, put the cookies in the oven. Put it in for around 10 minutes


6.) After finished baking, take the cookies out and let them cool for about 5 minutes.

7.) After the cookies cool down, remove them by a spatula and serve or store! Enjoy!


So after I showed you these recipes, I just want to ask you one question. What are you going to eat for dessert tonight?

Lagasse, Emeril. Emeril 20-40-60: Fresh Food Fast. Comp. Steven Freeman. New York: HarperStudio, 2009. Print.                         


Wednesday, November 30, 2016

Brownie Points

Baking has been an essential part of cultures throughout the entire world. It is a cherished hobby for its delicious treats and ability to bring cultures and people together. It is an art that takes minutes to love, but years to master. That is why I was drawn to baking. Time-consuming occupations are drawing to me and I hope more can enjoy them as well

Brownies are a delectable treat that everyone enjoys. As Sally says, "There is nothing in this world that compares to a homemade brownie" (MckKenney 43). We will be diving into her Death By Chocolate Brownies recipe. Ingredients required are as followed:

  • 1/2 cup (1 stick or 115g) of salted butter
  • 80z of coarsely chopped semi-sweet chocolate
  • 1 cup (200g) of granulated sugar
  • 3 eggs (cold)
  • 1 tsp of vanilla extract
  • 3/4 cup (95g) of all-purpose flour
  • 1/4 tsp of salt
  • 1 1/2 cups (225g) semi-sweet chocolate chunks or chocolate chips
The prep time should take 20 minutes and the total baking time is around 65 minutes. This recipe makes about 20 brownies (McKenney 43).

Recipe:
  1. To begin, melt the butter and chopped chocolate in a medium saucepan on medium heat, stirring constantly, for about 5 minutes. Remove from the heat, pour into a large bowl and allow slight cool for 10 minutes. 
  2. Then, adjust the oven rack to the lower third position and preheat the oven to 350 degrees Fahrenheit. Line the bottom and sides of an 11x7 in baking pan with aluminum foil, leaving an overhang on all sides. Set aside.
  3. Stir the granulated sugar into the cooled chocolate/butter mixture. Add in the eggs, one at a time, whisking until smooth after each addition. Whisk in the vanilla. Gently fold in the flour and salt. Pour batter into the prepared pan and bake for 37-45 minutes or until the brownies begin to pull away from the edges of the pan. Tip: A toothpick inserted in the center should come out with only a few moist crumbs when they are done (McKenney 43).
  4. Allow the brownies to cool completely in the pan set on a wire rack. Lift the foil out of the pan using the overhang on the sides and cut into squares. The brownies will stay fresh in an airtight container at room temperature for 1 week. 
  5. Enjoy!

The brownies were a success! The baking was time-consuming, it being my first time baking, but the final product was worth it and delicious.

If I were to do this recipe again it would have been easier if I had my supplies handy and ready before I started cooking. It was a struggle having a cracked egg in my hand while trying to find whisk. Also, I would have let the brownies sit and cool longer because the cutting got messy when my knife slice through the center and chocolate goop was dripping from the knife. 

If you are looking to indulge yourself into to baking I would highly recommend McKenney's brownie recipe because it is easy for beginners and an enjoyable experience. 

What is your favorite homemade dessert? Do you like chocolate? Or are you more of a vanilla type person? 

Thanks for reading!

McKenney, Sally. Sally's Baking Addiction: Irresistible Cookies, Cupcakes, & Desserts for Your Sweet-tooth Fix. New York, NY: Race Point, 2014. Print.