Showing posts with label Yum. Show all posts

Sunday, January 29, 2017

Ricotta Cranberry Custard

Hello! For my final blog post, I have chosen to make "Ricotta Cranberry Custard" from my book, Petite Sweets.

This recipe was chosen by my dad and older brother, Austin. I think my brother chose this because the picture from the book looks like cheesecake, and he loves cheesecake. But let me tell you, it's definitely not cheesecake. But we'll get to that later.
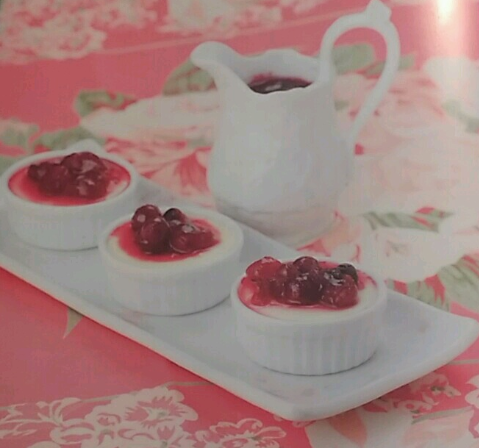
Ricotta Cranberry Custard from Petite Sweets (Ojakangas 98)
To start, I gathered the necessary ingredients: 

Custard: 
  • 12 ounces (1½ 8-ounce packages) cream cheese
  • ¾ cup ricotta cheese
  • 2 large eggs
  • ½ teaspoon pure vanilla extract
  • ½ cup sugar 
  • ½ cup heavy cream
Sauce: 
  • 2 cups fresh or frozen cranberries
  • 1 cup water
  • 1 cup sugar
First I preheated the oven to 250°F. Then I added the cream cheese to the electric mixer. 

But that's when I realized I only had one stick of cream cheese, instead of two, to complete the one AND one half ounces of cream cheese needed. 

Now that my whole recipe was off due to lack of one ingredient, I had to problem solve. I really wanted to get this done that day because the rest of the week I would be busy and I didn't want to put my mom in a bad mood by making her go all the way to the store just for one stick of cream cheese so, I did the only thing I could do. I adjusted the whole recipe. 
Since I only had 8 ounces of cream cheese instead of 12, I knew 8 divided by 12 was 2/3. That meant I would have to multiply my whole recipe by 2/3. 
So, I did. Except the eggs, which I just left at 2. 

Now that I was back on track, I started adding my ingredients to the electric mixer again; ricotta, eggs (one at a time), vanilla, sugar, and cream and mixed until combined (Ojakangas 99).

Once everything was smooth, I spooned the batter into two ramekins. After they were evenly divided among the two, I placed each one into a large, transparent baking dish. Then I poured "enough hot water into the baking [dish] around the ramekins to reach about halfway up the sides" (Ojakangas 99).
Carefully, I placed each baking dish with the ramekin inside into the oven and set it for 40 minutes. When 40 minutes had passed, I took them both out of the oven. "The top should not have changed color at all" (Ojakangas 99) and since it didn't, I knew I was on my way to making a successful dessert.
After they had cooled slightly, I wrapped both of the ramekins with saran wrap and placed them in the fridge, where they would stay and chill for about three hours. 

In the meantime, I started working on the sauce. Though, that didn't take long either. 
But I'm 90% sure I messed up the sauce too. My mom had gotten me a cranberry sauce can where all I had to do was heat it up and mix it around, but I didn't realize that so I put that in a pot and heated it up and mixed it around, as well as adding one cup of water and one cup of sugar. It came out fine though so nothing too problematic. 

So I wrapped that up like I did with the ramekins and placed it in the fridge where it would chill for three hours as well. 

When everything had chilled for three hours, I took it out of the fridge. 
And then I scooped the cranberries on top of the custard (I probably shouldn't have added so much cranberry to the first one).

What I learned from this experience is that custard ≠ cheesecake. I went into that first bite thinking something solid, but my spoon went through it like goo. Keep in mind that I hadn't really read the title of this recipe, I just saw the picture and went "ooh la la" and wanted to make it. I know what custard is... now. 

If I were to do this again, I'd probably try to find something better to do in those three hours where all I did was wait. Also, I would've made sure I had all my ingredients ahead of time.

I would recommend making this dessert if you have a lot of free time and like custard. Me? I don't like it so much. 

Have you ever tried a food that you thought would taste totally different based on it's looks? 

Thanks for reading!

Ojakangas, Beatrice, and Roger LePage. Petite Sweets: Bite-Size Desserts to Satisfy Every Sweet Tooth. Portland, Me.: Sellers, 2009. Print.

Chocolate Dipped Almond Biscotti

Hello! For this blog post I have chosen to make "Chocolate Dipped Almond Biscotti" from my book, Petite Sweets

This recipe was chosen by my mom because she loooves biscotti. She says it's perfect to eat in the morning with your coffee. I think it's just an excuse to eat some tasty dessert for breakfast. My mom also makes these around the Christmas time and dips the chocolate covered part into crushed candy canes for decoration (and taste).
Chocolate Dipped Almond Biscotti from Petite Sweets (Ojakangas 138)
 To make the Biscotti, I first had to gather all the ingredients I would need:

  • ½ cup sugar
  • 4 tablespoons (½ stick) butter, melted
  • 1 teaspoon pure almond extract
  • ½ cup almonds, chopped
  • 2 large eggs
  • 1 ¼ cups all-purpose flour
  • 1 ½ teaspoons baking powder
  • ¼ teaspoon salt
  • 1 cup semisweet chocolate chips

Before I started baking, I preheated the oven to 350°F. 
Then, using the electric mixer, I creamed the sugar, butter, and eggs until smooth (Ojakangas 139). Because my family isn't a huge almond fan, I left out the chopped almonds and also added a little less than the recommended amount of almond extract. When everything was smooth, I poured in the flour, baking powder, and salt. 

When everything was combined together, I split the dough in half and rolled out each half on a floured board. 
Once that was done, I transferred the dough onto a cookie sheet.
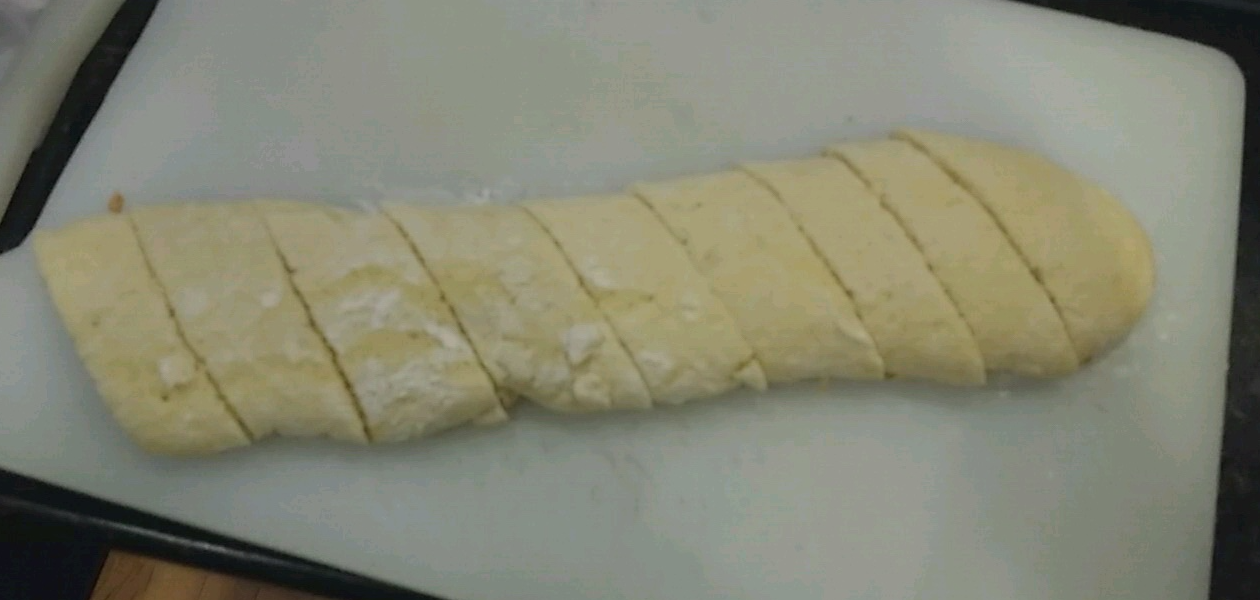
Then I baked the dough for 20-25 minutes. When it was firm, I "removed from the oven and let [it] cool slightly" (Ojakangas 139). Once it was cool enough for me to handle, I sliced both pieces of dough diagonally. 
 After slicing them, I evenly spread them out on the baking sheet and placed them back in the oven for 10 minutes.
 Then I took them out again, flipped each one, and placed it back in the oven for another 10 minutes, or until it was lightly browned and toasted (Ojakangas 139). 
Since the biscotti part was done, it was time to work on the chocolate dip. I took a small bowl, filled it with chocolate chips, and placed the bowl over boiling water. Every so often I stirred the chocolate chips until they started to melt and from there on I continued to stir them so they wouldn't burn on the bottom. 
When the chocolate was fully melted, I took each slice of the baked biscotti and dipped each one into the melted chocolate and voila! You have your biscotti.
If I were to do this recipe again, I would maybe think of a way to jazz it up, such as a decoration on top like my mom's crushed candy canes (but something different since I've already tried that) or maybe incorporating something into the dough like chocolate chips so you get them throughout the whole biscotti.

This recipe was a lot easier than my previous baking attempts, since I have perfected it by watching my mom in the past and getting her help during the process. I recommend this recipe if you want something good to go along with your coffee in the mornings. 

What recipes have you perfected? How did you perfect them? Did it take time and help?

Thanks for reading!

Ojakangas, Beatrice, and Roger LePage. Petite Sweets: Bite-Size Desserts to Satisfy Every Sweet Tooth. Portland, Me.: Sellers, 2009. Print.

Cookies! Part 2! *u*

Soft Buttermilk Sugar Cookies 

For this recipe you will need:
1/2 cup shortening
1 cup of sugar
2 eggs
2 teaspoons of vanilla extract
2 cups of all-purpose flour
2 teaspoons baking powder
1 teaspoon salt
1/2 teaspoon of baking soda
1/2 cup buttermilk
cinnamon (Optional) 

"My grandma used to make these family-pleasing cookies. The memory of her and these cookies go together!" ( Rowlett 547)

Step one: Cream together the shortening and the sugar until well combined.

Step two: Add in the eggs and vanilla to the mixture.

Step three: Sift the dry ingredients together. So that would be the flour, baking powder, baking soda, and the salt. You want to do this so that you don't get clumps of flour in a cookie, because then it would taste like you stuck your face in sand at the beach.

Step 4: Alternate adding in the buttermilk and the dry ingredients. So put half of one mixture and mix, and then add half of the other mixture until there is no more ingredients.

Step 5: Grease a pan and add the cookie batter. You then can add a mixture of cinnamon sugar on top of the batter in this step if you want to. (I'd say add it, because I made them and it's really tasty). No bias at all, but sugar and spice make everything nice.

Step 6: Preheat your oven to 375 degrees Fahrenheit and then cook the batter for 8-10 minutes, or until the edges of the cookies begin to brown.

THESE COOKIES ARE SOOOOOO GOOD. Like I'm not bias or anything, well, okay yeah I am, BUT THEY ARE SOOOOO GOOD.  They taste amazing and they are light and fluffy. This recipe was super easy to follow and I'd 100% make these cookies again in the future. One quick tip: they puff up and expand about double the size they were before they got cooked, so give them space between each other. 

One thing I did do to alter the recipe, was I put some of the batter in a muffin tray. I did this because I'm lazy and I didn't want to waste time for a second batch of cookies. They cook the exact same way the normal cookies were cooked, and they become lovely little muffins. I already feel my lifespan shortening as I eat these yummy treats.  

(Final Product)

      My question is this: Since its finals week, how do you guys prefer studying? My preference is not at all, but that'd get me an F so I actually have to study. ;-;                       

Rowlett Traci. “Cookies and Bars” The Taste of Home Cookbook: from the World's #1 Cooking Magazine, Reiman Media Group, Greendale, WI, 2010.